Automatic Drip Irrigation for a Madipakkam Terrace Garden
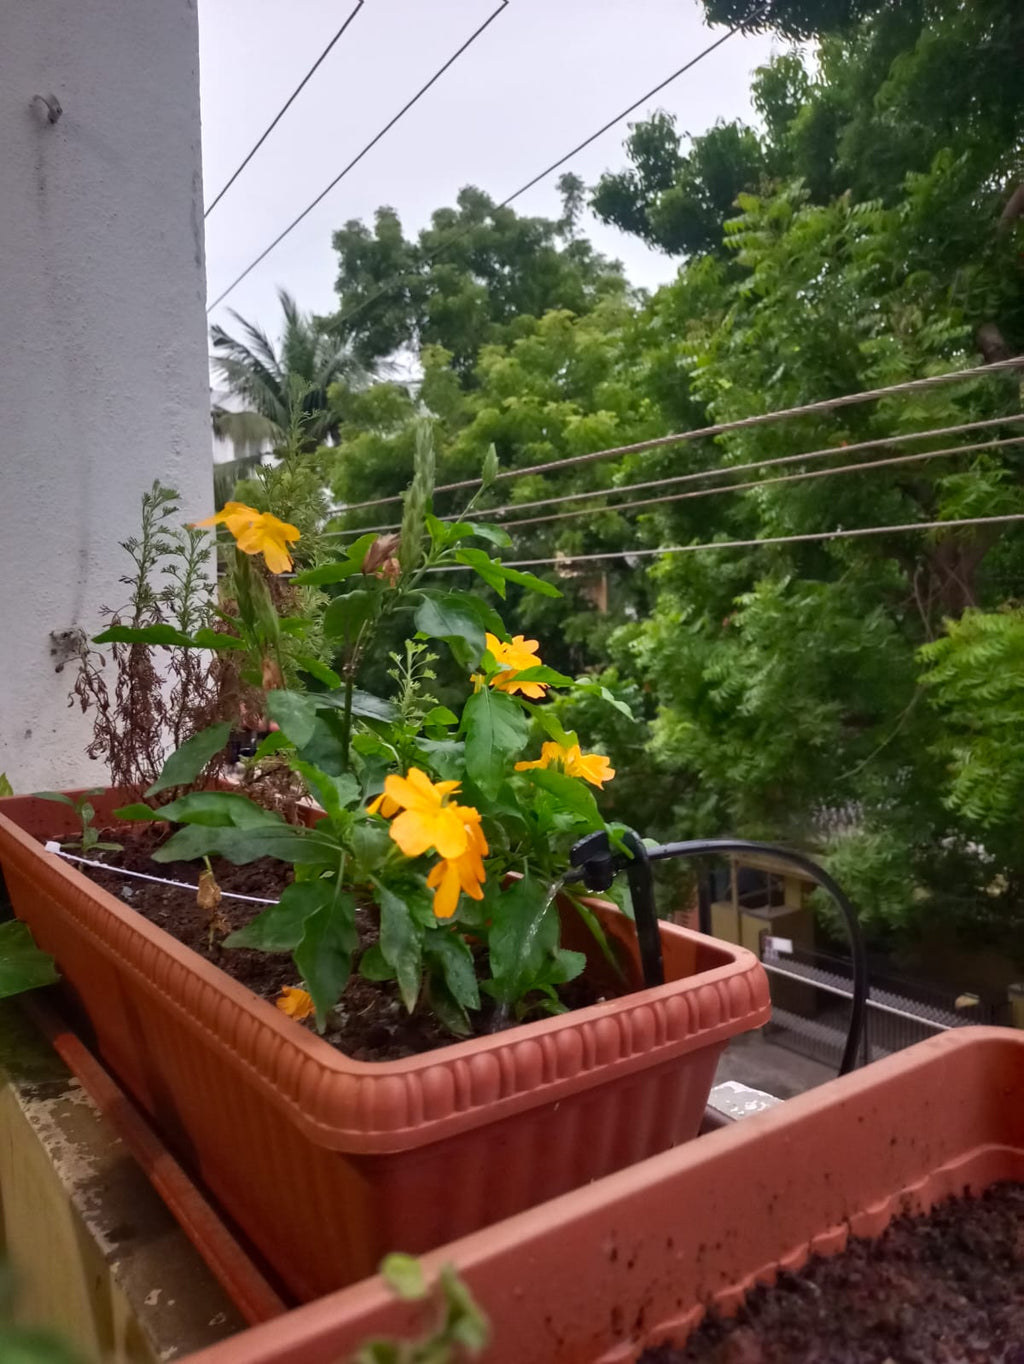
This home garden in Madipakkam, Chennai is spread over three spaces: an open terrace, a netted enclosure on the terrace, and a covered balcony. Between them there are dozens of containers, including grow bags with fruit trees, planter boxes of greens and herbs, tomato seedlings, curry leaf, lemongrass, hibiscus and crossandra. Watering all of that by hand, every day, through a Chennai summer, takes a lot of time. It's also easy to get wrong.
We set up an automatic drip system so that every container gets water at its roots on a schedule, without anyone holding a hose. Below is how it works, part by part, and how to tune it for your own garden: how much water to give, how to handle pots of different sizes, and what to change during the monsoon.

How the system works
An automatic drip system for containers has four parts. Water flows through them in this order:
1. The controller and valve
On the wall pipe sits a battery-operated Hunter controller mounted directly on a 1-inch Hunter PGV solenoid valve. At the programmed time, the controller opens the valve, lets water through for the set duration, then closes it.

Three things make this type of controller a good fit for a terrace:
- No mains wiring. Hunter's NODE controllers run on 9V alkaline batteries, so there's no need to run electricity to a wet, exposed terrace.
- It's built for the outdoors. Hunter rates the NODE as IP68, which means it can sit outside through rain.
- Seasonal adjustment. You can scale every run time up or down by percentage (10–150% on the NODE) instead of reprogramming. That's useful when the weather changes.
The controller also has an input for a Hunter Clik rain sensor, which can stop watering after rain. That matters in Chennai, as explained below.
2. Branch lines with their own shut-off
From the PVC supply pipe, a 16 mm drip line branches off to each part of the garden through a take-off fitting. Each branch has a small shut-off valve. That lets you isolate one section (say, the balcony) for repairs or to skip it on rainy days, without turning off the rest of the system.

3. Microtubes to each container
The 16 mm line runs along the wall and behind the containers. From it, a thin 6 mm microtube runs into each pot, grow bag or planter box. The lines sit out of the way, so you can still walk, prune and harvest freely.
4. An adjustable tap on a stake in every container
Each microtube ends in an adjustable micro tap held on a stake, pointing water onto the soil near the roots. Twisting the tap's changes its flow, so each container can get a different amount of water from the same line.

Drip suits containers because water goes straight into the root zone. Leaves stay dry, soil isn't splashed out of the pot, and you don't lose water to wind drift or paths.

How much water should each container get?
There's no single correct run time for pots. Container size, potting mix, plant size, sun and season all change it. Nurseries use a simple measurement called the leaching fraction: how much of the water you apply drains out of the bottom of the pot.
Virginia Cooperative Extension's guide for container-grown plants calculates it as water drained ÷ water applied. It suggests targeting roughly 15–30%. Below that, the mix may not be getting wet all the way through. Well above it, you're wasting water and washing nutrients out.
A home version of the test:
- Measure what the tap gives. Hold a measuring jug under it for one minute, then multiply by your run time in minutes.
- Catch what drains. Put a tray or bucket under one pot, then run a normal watering cycle.
- Wait about one hour after watering ends, as the extension guide recommends, then measure the water in the tray.
- Divide drained by applied. If it's under 15%, increase the run time or open the tap a little. If it's well over 30%, cut back.
- Repeat on at least three containers on the same line. The guide suggests sampling at least three plants per zone, ideally pots of different sizes.
Handling different container sizes on one line
This garden mixes large grow bags with fruit trees, round pots and shallow planter boxes, all on the same system. A shallow planter box holds much less mix than a large grow bag, so it dries out sooner. Two ways to keep everything evenly watered:
- Adjust the taps. Set the run time for the thirstiest containers, then turn down the taps smaller pots.
- Add Taps to big containers. Large grow bags and trees can take two taps on opposite sides, which wets more of the root zone.
Check with the drainage test after any change.


Details worth copying from this garden
- Containers raised off the floor. Pots and grow bags here sit on pallets and stone slabs. The drainage holes stay clear and water doesn't pool under the containers, which also helps when you check how much is draining.
- Everything grouped along the walls. The drip line runs behind the containers, so the walking space stays clear and the tubing is protected from being stepped on.
- A netted enclosure on part of the terrace for the fruit trees and vegetables to prevent brids from feeding on your delicious harvest.

Keeping it running: a short checklist
- Watch a full cycle once a week. Make sure every tap is flowing. A tap that's stopped means a dry pot within days.
- Clear clogged taps. Unscrew the cap and rinse it. If clogging keeps happening, add a filter at the start of the line.
- Re-seat microtubes after pruning or repotting. A stake knocked out of a pot waters the floor instead of the plant.
- Check the battery at the start of each season and replace it before the hot months.
- Repeat the drainage test when the season changes or a plant grows much bigger.

Frequently asked questions
Does an automatic garden timer need electricity on the terrace?
Not if you use a battery-operated controller like the one in this garden. Hunter's NODE runs on 9V batteries and sits directly on the valve.
How long should I run drip irrigation for pots?
Start with a short cycle, then use the drainage test above and adjust until about 15–30% of the water drains out. In hot weather, two shorter cycles a day (morning and evening) often work better for small containers than one long one.
Can one system water small pots and big grow bags together?
Yes. Use adjustable drippers and set each one to suit its container, or give the largest containers two drippers.
Should I switch off drip during the monsoon?
Reduce it rather than switching it off, especially if some of your containers are under a roof or overhang and don't get rain.

Equipment used
The parts for a setup like this are the irrigation automation timer, adjustable drip emitters with microtube and microtube stands, and the brown 16 mm landscaping pipe and fittings. For a smaller balcony, the home garden drip kit is a simpler starting point. The automation timer needs a technician to install it, so contact us if you'd like a similar setup.
-
Posted in
Automation, Chennai, Container gardening, Drip irrigation, Home garden, Terrace garden